How to Use a Griddle Press for the Perfect Smash Burger
-
Why the smash matters
-
Preparing your meat and heat
-
The step-by-step smash technique
-
Choosing the right tool for your style
-
The Cuisinart CISB-111 Smashed Burger Press
-
The Pisol Pre-Seasoned Cast Iron Smasher
-
The Firsgrill Heavy-Duty Griddle Press
-
Keeping your burgers from sticking
-
Cleaning and Maintenance
-
Common Smash Burger Questions
-
The Bottom Line
Disclosure: Some of the links in this article may be affiliate links, which can provide compensation to me at no cost to you if you decide to purchase. This site is not intended to provide financial advice and is for entertainment only.
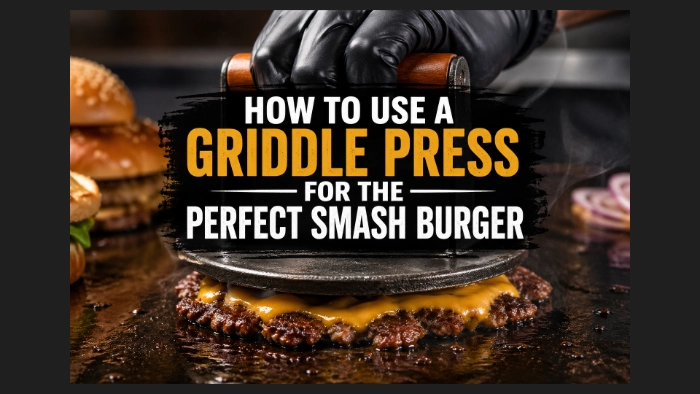
To use a griddle press for smash burgers, you start by placing a loosely packed ball of cold ground beef onto a ripping-hot, ungreased griddle surface.
You press down firmly with your tool for about 10 seconds to create maximum contact between the meat and the metal, which develops a salty, brown crust.
This technique creates a burger that is crispy on the outside but stays juicy on the inside because of how fast it cooks.

Why the smash matters
Most people think pressing a burger is a sin because it "squeezes out the juices."
While that’s true for a thick steakhouse burger halfway through cooking, smash burgers work differently.
By smashing the meat immediately when it hits the heat, you trigger the Maillard reaction.
This is a fancy way of saying the amino acids and sugars in the beef brown beautifully, creating a savory crust that you simply can't get with a standard patty.
The goal isn't just to make the burger flat.
You want to smear the edges of the meat against the griddle.
This creates those lacey, shattered edges that are the hallmark of a great diner burger.
To do this correctly, you need a tool that can handle significant pressure without bending or sticking.
Preparing your meat and heat
Before you even touch your press, you have to get the foundation right.
You should use ground beef with a high fat content — ideally 80/20.
The fat acts as the "glue" and the lubricant that prevents the meat from sticking to your press or the griddle.
Keep your beef cold until the very second it hits the heat.
Cold fat reacts better when it hits a 400°F surface, helping to create that immediate sear.
Shape the meat into round balls about 2 to 3 ounces each.
Don't pack them tightly; you want the meat to be "shaggy" so it spreads out easily under the weight of the press.
The step-by-step smash technique
Once your griddle is smoking hot, place two meat balls down.
Don't add oil; you want the meat to "stick" slightly to the griddle to help develop the crust.
The Initial Press: Place your press directly on top of the ball.
The Hard Smash: Use both hands if necessary to push down. You want the patty to be less than a quarter-inch thick.
The Hold: Keep the pressure on for about 10 seconds. This ensures the heat transfers deeply into the surface of the meat.
The Twist: Before lifting the press, give it a tiny circular twist. This helps the metal "shear" away from the meat so the patty doesn't pull up and stick to the bottom of the tool.
Change the sentence to: "If you want to see the visual breakdown of this entire process, check out our guide on How to Use a Cast Iron Burger Press for a deep dive into the mechanics.
Choosing the right tool for your style
Not every press feels the same in your hand.
Some are lightweight and built for speed, while others use sheer weight to do the work for you.
We looked at three of the most popular options to see how they handle a standard backyard cookout.
The Cuisinart CISB-111 Smashed Burger Press
This is often the entry point for most backyard chefs.
It’s made of heavy-duty cast iron and has a 6.25-inch diameter.
What makes it unique is the raised edge on the bottom.
Why we like it: The lip on the edge helps keep the burger's shape consistent.
It’s also relatively affordable and easy to find.
It’s a great "starter" press because it’s hard to mess up the shape of your patty with it.
The catch: Because it has a raised edge, you can't "smear" the meat outward as easily as you can with a completely flat press.
If you want those ultra-thin, irregular lacey edges, this might feel a bit restrictive.
The Pisol Pre-Seasoned Cast Iron Smasher
If you find that you're having to press down too hard with lighter tools, the Pisol model is built for pure power.
It is a heavy-duty, square cast iron press that comes pre-seasoned, meaning it has a natural non-stick coating right out of the box.
Why we like it: The weight does a lot of the work for you.
Because it's square and has a large surface area, it’s much easier to get those "shattered" edges.
You can push the meat right to the corners.
The wooden handle is also positioned high enough that you don't have to worry about your knuckles getting too close to the hot griddle.
The catch: Cast iron requires a bit of maintenance. Even though it comes seasoned, you'll need to keep it dry and occasionally rub it with a bit of oil to prevent rust.
The Firsgrill Heavy-Duty Griddle Press
For those who want to cook more than just burgers, the Firsgrill is a versatile choice.
It’s a 9-inch round press, which is significantly larger than the Cuisinart model.
This extra space makes it useful for bacon, paninis, or even pressing down steaks to ensure even browning.
Why we like it: The size is the biggest selling point.
You can easily smash two smaller sliders at once under this single press.
It also features a textured bottom that helps "grip" the meat, which can be helpful if you find your patties sliding around on a greasy surface.
The catch: The larger size means it takes up more "real estate" on your griddle.
If you're working on a smaller portable griddle, this might feel a bit bulky.
Keeping your burgers from sticking
Even with the best press, beef can sometimes stick to the metal, which ruins that beautiful crust you're trying to build.
There are two simple ways to stop this.
First, you can use a small square of parchment paper between the meat and the press.
This is a common trick in professional burger shops.
Once you've smashed the burger, you just peel the paper off.
Second, if you don't want to use paper, make sure your press is hot.
If you leave the press on the edge of the griddle so it warms up, the fat in the meat is less likely to seize up and stick to it.
As mentioned before, a quick "twist" of the press before you lift it up also helps break the bond.
Cleaning and Maintenance
Since most high-quality presses are made of cast iron, you should treat them like a cast iron skillet.
Don't use soap: Usually, a quick wipe with a damp cloth while the press is still warm is enough.
Dry it immediately: Never let a cast iron press air dry, or it will develop rust spots.
Oil it: Every few uses, rub a tiny drop of vegetable oil over the surface to keep the seasoning strong.
Proper care ensures your tools don't just last, but actually get better over time.
For a faster, deeper routine on keeping your gear rust-free, see our full tutorial: How to Clean Cast Iron Burger Press.
Common Smash Burger Questions
Do I need to grease the griddle first?
Actually, no.
You want the meat to stick to the griddle slightly.
This "stick" is what allows the crust to form.
If the surface is too oily, the meat will just slide around instead of searing.
Can I use a regular spatula instead of a press?
You can, but it’s much harder.
Most spatulas aren't stiff enough to apply the 10-15 pounds of pressure needed for a true smash.
If you use a spatula, you'll often need a second tool (like a sturdy wooden spoon) to press down on the blade.
What kind of cheese is best?
Classic American cheese is the standard for a reason — it melts almost instantly and has a mild flavor that doesn't overpower the crusty beef.
The Bottom Line
Using a griddle press is the easiest way to upgrade your backyard burgers from "standard" to "diner-style."
Whether you choose the guided edges of the Cuisinart or the heavy-duty weight of the Pisol, the key is high heat and a firm, 10-second smash.
P.S. – If you're looking to round out your kit, our guide on griddle tools for smash burgers covers the best spatulas and scrapers to help you flip those patties without losing the crust.
-
Why the smash matters
-
Preparing your meat and heat
-
The step-by-step smash technique
-
Choosing the right tool for your style
-
The Cuisinart CISB-111 Smashed Burger Press
-
The Pisol Pre-Seasoned Cast Iron Smasher
-
The Firsgrill Heavy-Duty Griddle Press
-
Keeping your burgers from sticking
-
Cleaning and Maintenance
-
Common Smash Burger Questions
-
The Bottom Line
Disclosure: Some of the links in this article may be affiliate links, which can provide compensation to me at no cost to you if you decide to purchase. This site is not intended to provide financial advice and is for entertainment only.