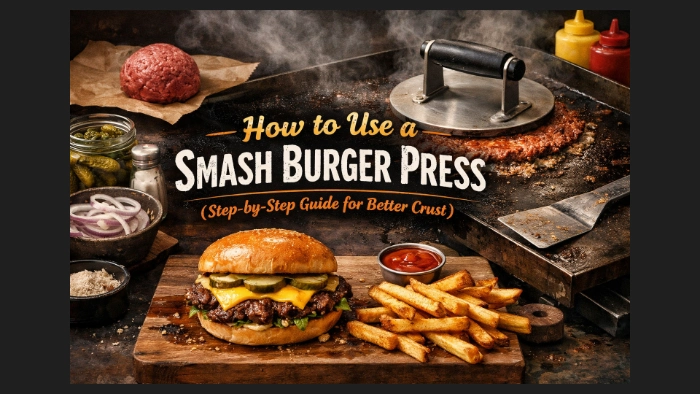
How to Use a Smash Burger Press (Step-by-Step Guide for Better Crust)
-
What a Smash Burger Press Actually Does
-
Step-by-Step: How to Use a Smash Burger Press
- 1. Start With the Right Meat
- 2. Preheat Your Cooking Surface
- 3. Place the Meat Ball Down
- 4. Smash Once, Firmly
- 5. Season Immediately
- 6. Let It Cook Undisturbed
- 7. Flip Once
-
Common Mistakes to Avoid
- Pressing More Than Once
- Smashing Too Late
- Using Lean Meat
- Cooking on Low Heat
-
The Right Smash Burger Presses to Use
- Firsgrill Heavy Duty Burger Press
- Pisol Pre-Seasoned Cast Iron Smasher
- Cuisinart Smashed Burger Press
-
Do You Need Parchment Paper?
-
When a Smash Burger Press Makes the Biggest Difference
-
Bottom Line
Disclosure: Some of the links in this article may be affiliate links, which can provide compensation to me at no cost to you if you decide to purchase. This site is not intended to provide financial advice and is for entertainment only.
A smash burger press is one of the simplest tools that can completely change how your burgers taste.
Used the right way, it creates a thin patty with crispy edges and a deep, beefy crust.
Used the wrong way, it can leave you with dry, tough meat.
The difference comes down to timing and pressure, not force.
This guide breaks down exactly how to use a smash burger press, what mistakes to avoid, and which tools actually make the job easier.
The tools include:

What a Smash Burger Press Actually Does
A smash burger press is not just for flattening meat. Its real job is to:
Maximize contact with the hot surface
Create a crust through direct heat
Lock in flavor by searing quickly
Unlike traditional burgers, you do not shape the patty beforehand.
The press does that work directly on the grill or griddle.
Step-by-Step: How to Use a Smash Burger Press
1. Start With the Right Meat
Use ground beef with at least 20% fat (80/20 blend).
Roll it loosely into balls, about 2 to 3 ounces each.
Do not pack them tight.
Loose meat gives you better texture and crisp edges.
2. Preheat Your Cooking Surface
This step matters more than anything else.
Heat your griddle or pan until it is very hot.
You should see light smoke.
A weak surface will steam the meat instead of searing it.
Flat tops and cast iron work best.
3. Place the Meat Ball Down
Put the meat ball directly onto the hot surface.
Do not press it yet.
Give it about 5 to 10 seconds so the bottom starts to sear slightly.
4. Smash Once, Firmly
Now use your press.
Place it on top of the meat and press down firmly for about 2 to 3 seconds.
Do not twist.
Do not press multiple times.
That single smash is what creates the signature thin shape and crispy edges.
If sticking is a problem, place a small square of parchment paper between the press and the meat.
5. Season Immediately
Add salt and pepper right after smashing.
Seasoning early helps build a better crust as the juices rise to the surface.
6. Let It Cook Undisturbed
This is where most people go wrong.
Do not press again.
Do not move it.
Let the burger cook for about 1 to 2 minutes until the edges look crispy and brown.
7. Flip Once
Use a sturdy spatula and scrape under the burger.
Flip it only once.
Cook the other side for another 30 to 60 seconds.
Add cheese right after flipping if you want a classic smash burger.
Common Mistakes to Avoid
Pressing More Than Once
This squeezes out juices and dries the burger.
Smashing Too Late
If you wait too long, the meat will not spread properly and you lose the crust.
Using Lean Meat
Low-fat beef turns dry fast with this method.
Cooking on Low Heat
Smash burgers depend on high heat. Without it, you just get thin, gray patties.
The Right Smash Burger Presses to Use
Not all presses work the same.
Weight, surface area, and grip all matter.
Firsgrill Heavy Duty Burger Press
This is a wide, heavy press designed for flat-top grilling.
It covers more surface area, which helps create even, thin patties.
The weight does most of the work, so you do not have to push as hard.
The downside is its size.
It can feel bulky if you are cooking in a small pan.
Pisol Pre-Seasoned Cast Iron Smasher
This press is all about weight and durability.
The cast iron holds heat well and gives consistent pressure, which helps build a strong crust.
But it is heavier than most, so it may feel tiring during longer cooking sessions.
Cuisinart Smashed Burger Press
This is a lighter, more beginner-friendly option.
It is easy to handle and works well for small batches.
The trade-off is less weight, so you need to apply more pressure yourself to get the same smash.
Do You Need Parchment Paper?
Not always, but it helps.
If your press sticks to the meat, a small square of parchment paper makes lifting clean and easy.
It also prevents tearing the patty during the smash.
When a Smash Burger Press Makes the Biggest Difference
A press matters most when:
You are cooking on a flat top or griddle
You want crispy edges, not thick patties
You are making multiple burgers quickly
If you mostly grill thick burgers on grates, you will not use it as often.
Bottom Line
A smash burger press is simple, but technique matters more than the tool.
Smash once, on a hot surface, and leave the burger alone.
That is what creates the crust and flavor that makes smash burgers different from everything else.
A heavier press makes the process easier, but even a basic one works if you follow the timing correctly.
P.S. - If you want to compare this with a traditional patty method, read how to use cuisinart burger press. It breaks down when pressing before cooking works better than smashing on the grill.
-
What a Smash Burger Press Actually Does
-
Step-by-Step: How to Use a Smash Burger Press
- 1. Start With the Right Meat
- 2. Preheat Your Cooking Surface
- 3. Place the Meat Ball Down
- 4. Smash Once, Firmly
- 5. Season Immediately
- 6. Let It Cook Undisturbed
- 7. Flip Once
-
Common Mistakes to Avoid
- Pressing More Than Once
- Smashing Too Late
- Using Lean Meat
- Cooking on Low Heat
-
The Right Smash Burger Presses to Use
- Firsgrill Heavy Duty Burger Press
- Pisol Pre-Seasoned Cast Iron Smasher
- Cuisinart Smashed Burger Press
-
Do You Need Parchment Paper?
-
When a Smash Burger Press Makes the Biggest Difference
-
Bottom Line
Disclosure: Some of the links in this article may be affiliate links, which can provide compensation to me at no cost to you if you decide to purchase. This site is not intended to provide financial advice and is for entertainment only.