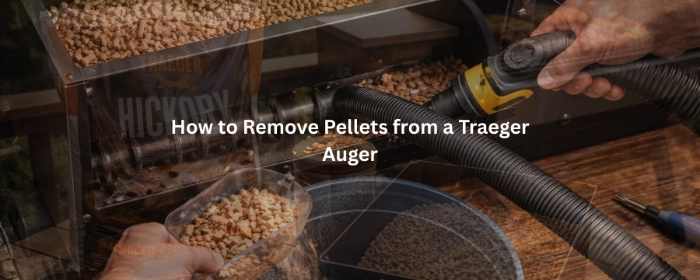
How to Remove Pellets from a Traeger Auger
-
Why Pellets Get Stuck in the Auger
-
Start by Emptying the Hopper
-
Remove the Internal Grill Components
-
Access the Auger Motor and Tube
-
Clean the Auger and Tube
-
Reassemble and Test the Grill
-
Preventing Future Auger Jams
-
Flaws but Not Dealbreakers
-
The Bottom Line
Disclosure: Some of the links in this article may be affiliate links, which can provide compensation to me at no cost to you if you decide to purchase. This site is not intended to provide financial advice and is for entertainment only.
Traeger pellet grills are designed to feed fuel automatically.
But if pellets get stuck in the auger tube, the system can stop working properly.
When this happens, you may notice your grill struggling to ignite, making loud grinding noises, or failing to feed pellets into the firepot.
Clearing pellets from the auger takes a little more effort than emptying the hopper, but the process is manageable with basic tools and patience.

Why Pellets Get Stuck in the Auger
The Traeger auger is the corkscrew-shaped mechanism that pulls pellets from the hopper and pushes them into the firepot.
When pellets stay dry and intact, they move smoothly through the system.
Problems usually start when moisture gets involved.
Pellets absorb humidity quickly.
Once they swell, they can crumble or expand inside the auger tube, forming a hard blockage.
This issue can happen with any hardwood pellet brand.
What matters is whether the pellets stayed dry.
Read Next: Best Grill Pellets: Top Pick Plus 2 Alternatives
Start by Emptying the Hopper
Before working on the auger itself, remove any remaining pellets from the hopper.
If your grill has a hopper clean-out door, open it and let the pellets fall into a container.
If it doesn’t, scoop them out by hand using a cup or small container.
Removing the hopper pellets prevents additional fuel from feeding into the auger while you’re clearing the jam.
Remove the Internal Grill Components
Next, open the grill lid and remove the internal cooking parts so you can access the firepot area.
Take out:
Cooking grates
The drip tray
The heat baffle or heat diffuser
With these parts removed, you can see the firepot where pellets normally drop and ignite.
If pellets are stuck in the auger, you may see compacted material near the opening.
Vacuuming out loose pellets and dust from this area is a good idea before continuing.
Access the Auger Motor and Tube
The auger motor sits behind the hopper.
To reach it, unplug the grill and remove the screws holding the hopper assembly in place.
Once the panel is off, you’ll see the motor connected to the auger shaft.
Detach the motor from the auger.
Most grills secure it with a small bolt or pin.
After disconnecting the motor, you can begin sliding the auger out of the tube.
Sometimes the auger pulls out easily.
Other times it requires gentle twisting to loosen compacted pellets.
If the auger is heavily jammed, breaking up the pellets inside the tube with a screwdriver or wooden dowel can help free it.
Read Next: Where to Buy Traeger Pellets (And Where You’ll Get the Best Value)
Clean the Auger and Tube
Once the auger is removed, inspect both the auger screw and the tube.
Any swollen pellets, dust, or debris should be cleared completely.
A shop vacuum works well for removing remaining fragments.
At this point, the auger should rotate freely by hand.
If it doesn’t, continue clearing debris until the tube is completely open.
A clean auger system ensures pellets will feed smoothly when the grill is reassembled.
Reassemble and Test the Grill
After cleaning, slide the auger back into the tube and reconnect the motor.
Reinstall the hopper panel and place the internal grill components back in their original positions.
Once everything is secure, refill the hopper with dry pellets and power on the grill.
Run the grill for a few minutes and watch the auger feed pellets into the firepot.
If pellets drop normally and ignition occurs, the jam has been cleared successfully.
Using quality pellets, such as Traeger Signature Blend All-Natural Hardwood Pellets can help maintain consistent feeding and reduce excess dust buildup.
Preventing Future Auger Jams
Most auger jams start with moisture exposure.
Pellets that feel soft, crumbly, or swollen should never go into the hopper.
Store pellet bags in a dry space and keep them sealed when not in use.
If your grill sits outdoors, avoid leaving pellets in the hopper for long periods between cooks.
Routine cleaning also helps.
Vacuuming the firepot and hopper every few cooks removes pellet dust that can eventually cause feeding problems.
Flaws but Not Dealbreakers
Clearing a Traeger auger jam takes more effort than typical grill maintenance.
Removing panels and internal components can feel intimidating the first time.
However, pellet grill augers are designed to be serviceable.
Once you understand how the system works, the process becomes much easier.
Most grill owners only need to do this once, usually after pellets absorb moisture during storage.
The Bottom Line
Removing pellets from a Traeger auger requires clearing the hopper, accessing the auger tube, and physically removing the jammed pellets.
The procedure is nearly identical regardless of pellet brand.
Whether you use Traeger, Pit Boss, or Bear Mountain pellets, the key factor is keeping pellets dry and free of dust.
With proper storage and occasional cleaning, auger jams are rare, and your pellet grill will continue running smoothly for years.
P.S. - If you’re planning longer cooks, it also helps to know how long your fuel will last. Our guide, How Long Does a Bag of Traeger Pellets Last?, breaks down burn time by temperature so you can avoid running out mid-cook.
-
Why Pellets Get Stuck in the Auger
-
Start by Emptying the Hopper
-
Remove the Internal Grill Components
-
Access the Auger Motor and Tube
-
Clean the Auger and Tube
-
Reassemble and Test the Grill
-
Preventing Future Auger Jams
-
Flaws but Not Dealbreakers
-
The Bottom Line
Disclosure: Some of the links in this article may be affiliate links, which can provide compensation to me at no cost to you if you decide to purchase. This site is not intended to provide financial advice and is for entertainment only.