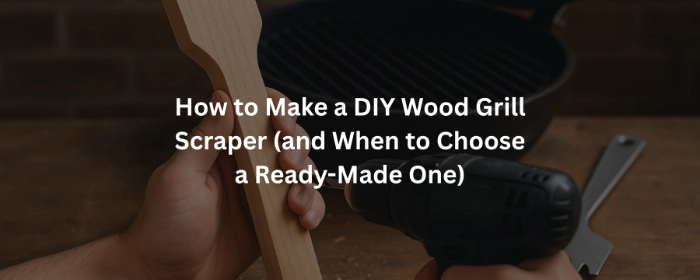
How to Make a DIY Wood Grill Scraper (and When to Choose a Ready-Made One)
-
Why Use a Wood Grill Scraper Instead of Metal?
- What You’ll Need
-
Choose the Right Wood
-
Cut the Handle and Scraping End
-
Sand It Smooth
-
Drill a Hanging Hole (Optional)
-
Apply Mineral Oil
-
Burn in the Grooves
-
Maintain Your Scraper
-
When to Choose a Professional Wood Grill Scraper
-
Final Thoughts
Disclosure: Some of the links in this article may be affiliate links, which can provide compensation to me at no cost to you if you decide to purchase. This site is not intended to provide financial advice and is for entertainment only.
Keeping your grill clean doesn’t have to involve metal bristles or harsh chemicals.
If you love hands-on projects, learning how to make a DIY wood grill scraper can be a fun and practical way to maintain your grill.
A wooden scraper naturally molds to your grill grates over time, giving you a personalized fit that’s safe and effective.
Let’s go through an easy step-by-step guide to make your own wooden grill scraper, plus when it might make more sense to buy a professional-grade one instead.

Why Use a Wood Grill Scraper Instead of Metal?
Traditional wire brushes can shed bristles that end up in your food, a real health hazard.
Wooden scrapers, on the other hand, are bristle-free, eco-friendly, and safer to use.
Over time, heat and pressure carve grooves into the wood that match your grill grates perfectly.
They also have a rustic charm that fits the backyard BBQ vibe.
If you’d like to see more about how wooden scrapers outperform wire brushes in long-term use, check out Effortless Cleaning with the Ultimate Wooden Grill Scraper on Behind The Grill.
It offers great insights into how these tools make grill maintenance easier and safer.
What You’ll Need
Before you start, gather these simple materials:
A piece of hardwood like oak, maple, or hickory
A saw or jigsaw
Sandpaper (medium and fine grit)
Drill (optional, for adding a hanging hole)
Food-safe mineral oil (for sealing)
Choose the Right Wood
The best scrapers are made from hardwoods because they resist chipping and burning.
Avoid softwoods like pine, which can release resin and burn easily.
Look for a solid, smooth board about 12–18 inches long and ¾ inch thick.
If you have scrap wood from another project, check that it’s untreated and free from glue or finish.
Cut the Handle and Scraping End
Use your saw to cut out a simple paddle shape.
The handle should feel comfortable in your hand, and the flat end should be wide enough to cover a few grill grates at once.
You can round the handle edges slightly to make it easier to grip.
Sand It Smooth
Start with medium-grit sandpaper (around 120 grit) to remove any rough edges.
Then use fine-grit sandpaper (220 grit or higher) for a smooth finish.
Pay extra attention to the corners and handle, they’ll feel much better during use.
Drill a Hanging Hole (Optional)
If you like keeping your tools organized, drill a small hole in the handle so you can hang the scraper next to your grill.
It’s a nice touch and helps it dry out between uses.
Apply Mineral Oil
Before using your new scraper, coat it with food-safe mineral oil.
This helps protect the wood from heat and moisture.
Let it soak in overnight before the first use.
Burn in the Grooves
This is the fun part.
Fire up your grill, let it heat up, and then firmly press your scraper back and forth across the hot grates.
The wood will slowly char where it meets the metal, forming custom grooves that match your grill perfectly.
Repeat this process over several sessions, the grooves will get deeper with each use, improving cleaning power.
If you’re interested in other ways to clean your grill safely using things you already have at home, you might enjoy reading Top DIY Grill Cleaning Solutions with Household Items.
It’s full of clever, eco-friendly cleaning ideas for every grill master.
Maintain Your Scraper
After each use, shake off any ash or residue.
Avoid soaking the scraper in water, just wipe it down and reapply mineral oil occasionally to keep it in good shape.
If it starts to thin or crack after long use, it’s easy to make another one.
When to Choose a Professional Wood Grill Scraper
If you don’t have the tools or time to make one yourself, there are excellent ready-made options available that follow the same safe, bristle-free design.
The Easy Function Wood Grill Scraper is a great example.
It’s made from high-quality hardwood, pre-shaped for common grill grates, and designed to naturally form grooves over time, just like your DIY version.
This scraper offers a sturdy grip and smooth finish that many users find hard to replicate by hand.
Final Thoughts
Learning how to make a DIY wood grill scraper is a rewarding weekend project for any griller who likes to build their own tools.
It’s simple, safe, and gives you a custom-fit cleaning tool that improves the more you use it.
But if you’d rather skip the sawing and sanding, a professional scraper like the one from Easy Function delivers the same benefits, right out of the box.
👉 Click the image below to check out Easy Function’s full range of BBQ tools and accessories for safer, easier grilling.
-
Why Use a Wood Grill Scraper Instead of Metal?
- What You’ll Need
-
Choose the Right Wood
-
Cut the Handle and Scraping End
-
Sand It Smooth
-
Drill a Hanging Hole (Optional)
-
Apply Mineral Oil
-
Burn in the Grooves
-
Maintain Your Scraper
-
When to Choose a Professional Wood Grill Scraper
-
Final Thoughts
Disclosure: Some of the links in this article may be affiliate links, which can provide compensation to me at no cost to you if you decide to purchase. This site is not intended to provide financial advice and is for entertainment only.