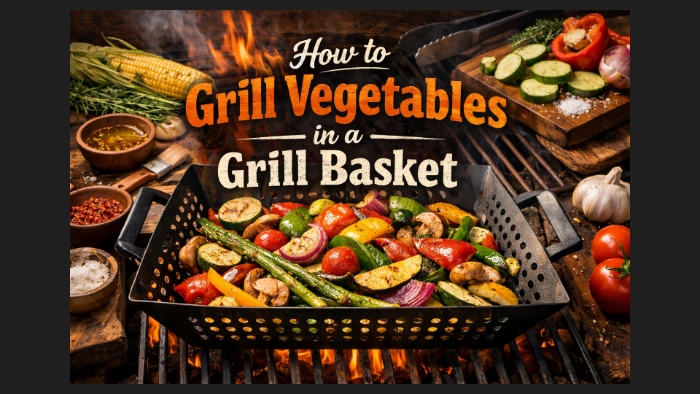
How to Grill Vegetables in a Grill Basket
-
Why Use a Grill Basket?
-
Step 1: Choose the Right Vegetables
-
Step 2: Cut for Even Cooking
-
Step 3: Oil and Season Properly
-
Step 4: Preheat the Grill and Basket
-
Step 5: Cook and Toss Frequently
-
Step 6: Watch for Doneness
-
Common Mistakes to Avoid
-
Bottom Line
Disclosure: Some of the links in this article may be affiliate links, which can provide compensation to me at no cost to you if you decide to purchase. This site is not intended to provide financial advice and is for entertainment only.
Grilling vegetables sounds simple, but it often goes wrong in two ways.
Small pieces fall through the grates, or everything turns mushy before you get that charred flavor.
A grill basket fixes both problems.
It keeps vegetables contained while still letting heat and smoke do their job.
If you want evenly cooked, slightly crisp vegetables with real grill flavor, a basket is one of the easiest tools to use.

Why Use a Grill Basket?
A grill basket acts like a pan with holes.
It holds small or chopped vegetables while exposing them directly to the flame.
This matters because vegetables cook fast and unevenly.
Without a basket, you are constantly flipping tiny pieces or losing them to the fire.
A good basket gives you:
Even heat exposure
Easy stirring and flipping
No food falling through grates
But there is a trade-off.
You won’t get deep grill marks like you would on larger cuts like zucchini planks or corn.
Step 1: Choose the Right Vegetables
Not all vegetables behave the same on a grill.
Best options for a grill basket:
Bell peppers
Zucchini and squash
Mushrooms
Onions
Cherry tomatoes
Asparagus (cut into shorter pieces)
Hard vegetables like carrots or potatoes need to be sliced thin or partially pre-cooked.
Otherwise, they burn outside before softening inside.
Step 2: Cut for Even Cooking
Uniform size is key.
Cut everything into similar pieces, about 1 to 1.5 inches.
This helps them cook at the same speed.
If pieces are too small, they can overcook quickly even inside the basket.
Step 3: Oil and Season Properly
Before grilling, toss vegetables with:
1 to 2 tablespoons of oil
Salt and pepper
Oil prevents sticking and helps with browning.
You can add garlic powder, paprika, or herbs, but avoid heavy marinades.
Too much liquid can cause steaming instead of grilling.
Step 4: Preheat the Grill and Basket
Heat your grill to medium or medium-high.
Place the empty basket on the grill for 3 to 5 minutes before adding vegetables.
This jump-starts the sear and prevents sticking.
Step 5: Cook and Toss Frequently
Add the vegetables to the hot basket and spread them out.
Cook for 8 to 15 minutes depending on the type.
Toss or shake the basket every 2 to 3 minutes.
This step is important.
If you leave them untouched, they may burn in spots while staying undercooked elsewhere.
Step 6: Watch for Doneness
Vegetables are ready when:
Edges are slightly charred
Texture is tender but not soft
Color looks vibrant, not dull
Remove them a bit early if you prefer a slight crunch.
Common Mistakes to Avoid
Even with a basket, a few things can go wrong.
Overcrowding is the biggest issue.
Too many vegetables trap steam, and you lose that grilled texture.
Using too low heat is another problem.
You end up with soft, pale vegetables instead of caramelized ones.
Lastly, skipping oil often leads to sticking and uneven browning.
A clean cooking surface helps too. For a simple pre-cook cleanup trick, read: Clean Grill With Potato! Here’s the Easy Function Way
Bottom Line
A grill basket makes vegetable grilling simple and reliable.
Cut evenly, use enough heat, and toss often.
That is all it takes to get flavorful, slightly charred vegetables every time.
It may not replace direct grilling for larger items, but for mixed vegetables, it is one of the most practical tools you can use.
P.S. - If you’re still learning how grill baskets work and when to use them, the guide What Is a Grill Basket breaks it down in a simple, practical way.
-
Why Use a Grill Basket?
-
Step 1: Choose the Right Vegetables
-
Step 2: Cut for Even Cooking
-
Step 3: Oil and Season Properly
-
Step 4: Preheat the Grill and Basket
-
Step 5: Cook and Toss Frequently
-
Step 6: Watch for Doneness
-
Common Mistakes to Avoid
-
Bottom Line
Disclosure: Some of the links in this article may be affiliate links, which can provide compensation to me at no cost to you if you decide to purchase. This site is not intended to provide financial advice and is for entertainment only.