How to BBQ Ribs on the Grill: A Step-by-Step Backyard Guide
-
Choose the Right Ribs
-
Remove the Membrane
-
Season Generously
-
Preheat the Grill for Indirect Heat
-
Time to Grill (Low and Slow)
-
Wrap the Ribs (Optional for Extra Tenderness)
-
Sauce and Finish
-
Check for Doneness
-
Rest and Serve
-
Final Thoughts
Disclosure: Some of the links in this article may be affiliate links, which can provide compensation to me at no cost to you if you decide to purchase. This site is not intended to provide financial advice and is for entertainment only.
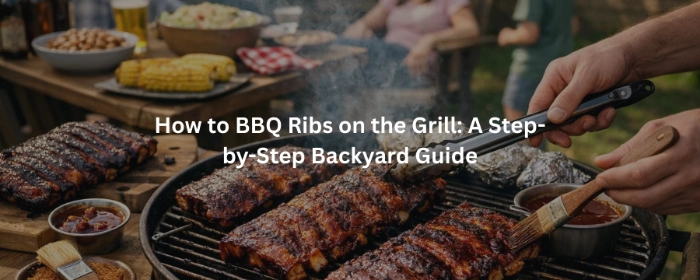
There's nothing quite like juicy, smoky, fall-off-the-bone BBQ ribs fresh off the grill.
If you've ever wondered how to BBQ ribs on the grill the right way — without drying them out or burning the sauce — you’ve come to the right place.
In this guide, we’ll walk you through each step to make perfect ribs at home.
Whether you're grilling baby back ribs or spare ribs, you’ll get a foolproof method that delivers big flavor.

Choose the Right Ribs
Start with the right cut.
The two most common types are:
Baby Back Ribs: Shorter, more tender, and cook a bit faster.
Spare Ribs: Larger, meatier, and more flavorful with longer cook times.
Make sure they’re fresh with good marbling (fat between the meat) for best taste and texture.
Remove the Membrane
On the back of the ribs, there’s a thin layer called the silver skin or membrane.
Use a butter knife to lift a corner, then grab it with a paper towel and pull it off.
Removing this helps your seasoning and smoke penetrate the meat better.
Season Generously
A dry rub brings the ribs to life.
You can use your favorite store-bought mix or make your own with:
Brown sugar
Paprika
Garlic powder
Onion powder
Salt & pepper
Cayenne (optional for heat)
Rub it into both sides of the ribs.
Let them rest for 30 minutes or wrap and refrigerate overnight for more flavor.
Want To Grill Beef Ribs Like a Pro? Learn How: How to Cook the Best Beef Ribs on a Gas Grill
Preheat the Grill for Indirect Heat
Turn on your grill and heat it to around 275°F to 300°F.
You’ll be using indirect heat, so only light one side of the burners (or bank coals to one side on a charcoal grill).
The ribs will cook slowly on the cooler side.
Pro Tip: Before placing your ribs on the grill, clean off any old grease or burnt bits. A solid tool like the Easy Function Wood Grill Scraper makes this easy—no bristles, no rust, just a simple wooden edge that shapes to your grate.
Time to Grill (Low and Slow)
Place the ribs bone-side down on the cooler side of the grill.
Close the lid and cook for about 2.5 to 3 hours.
Every 30–45 minutes, check the temperature and keep the grill between 275°F–300°F.
Add wood chips if you want a smoky flavor — applewood and hickory work great.
Wrap the Ribs (Optional for Extra Tenderness)
After 2 hours, you can wrap your ribs in aluminum foil with a splash of apple juice, honey, or butter.
This helps steam and tenderize them.
Wrap tightly and cook for another hour.
Not everyone wraps — but it can make your ribs extra soft.
Sauce and Finish
Unwrap the ribs carefully.
Add your favorite BBQ sauce and place the ribs back on the grill directly over the heat for about 10 minutes.
Flip once and sauce again for a sticky glaze.
Don’t leave them too long or the sugar in the sauce may burn.
Check for Doneness
You’ll know your ribs are done when:
The meat pulls back from the bones by about ½ inch.
You can twist a bone slightly, and it starts to loosen.
The internal temperature hits around 195°F.
Having a Meat Temperature Magnet nearby makes it easy to double-check the right temps for pork and other meats while you grill.
Rest and Serve
Remove your ribs from the grill and let them rest for 10–15 minutes.
This allows the juices to redistribute.
Then slice between the bones and serve with extra sauce, cornbread, and coleslaw for a complete BBQ experience.
Final Thoughts
Grilling ribs doesn’t have to be intimidating.
With the right prep, slow cooking, and careful saucing, you can make BBQ ribs that rival any restaurant.
Click the image below to check out our full range of grilling tools and accessories — from wood grill scrapers to magnetic smoking guides — to help make your next cookout even easier.
-
Choose the Right Ribs
-
Remove the Membrane
-
Season Generously
-
Preheat the Grill for Indirect Heat
-
Time to Grill (Low and Slow)
-
Wrap the Ribs (Optional for Extra Tenderness)
-
Sauce and Finish
-
Check for Doneness
-
Rest and Serve
-
Final Thoughts
Disclosure: Some of the links in this article may be affiliate links, which can provide compensation to me at no cost to you if you decide to purchase. This site is not intended to provide financial advice and is for entertainment only.